Configuring Mozilla Firefox Proxy Settings
Here are the steps to follow, for Firefox Proxy Settings: [ HTTP and HTTPS Proxy Settings in Firefox ]
Firefox Proxy Settings
- Open Firefox and select Tools > Options (for Firefox 56.0 and above, skip step 2 and 3)
- On the Options page, click Advanced (last menu-item in left side panel)
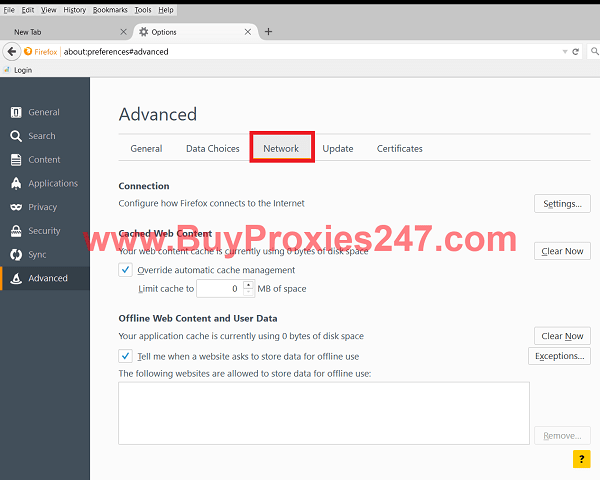
- Now select Network Tab (By default it is already selected)
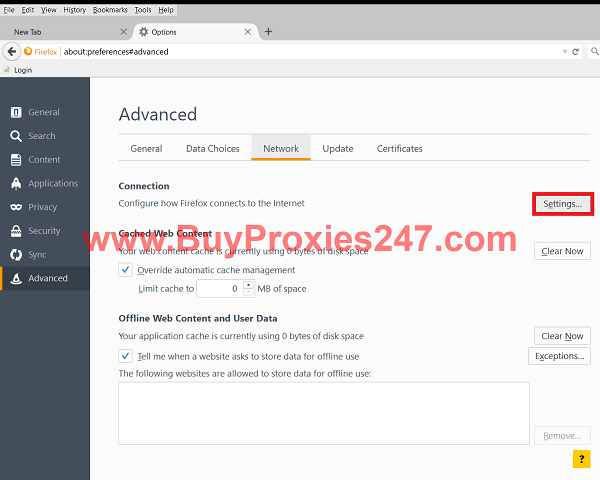
- Click Settings Button (first button from the top, at the left side of Network Tab)
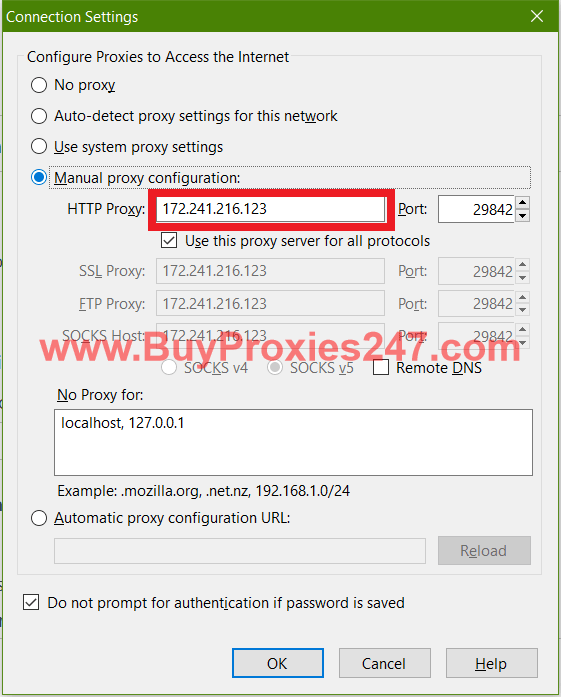
(UPDATE: for Firefox 56.0 and above, this option is available in the “General” tab. Scroll down to the bottom of this tab. “Settings” is available under the “Network Proxy” section on this page.) - Connection Settings Window will appear, select Manual Proxy Configuration option
- Paste HTTP proxy in the first textbox and Port in the second textbox, in the same first row.
- Make sure that Use this proxy server for all protocols is selected (select it if it isn’t)
- Press OK button
- Congratulations, you have successfully change HTTP proxy in firefox!!!
How to change firefox proxy settings (with pictures)
- Open Firefox and click on the Tools menu:

- Select Options in Tools-menu:

- Click on Advanced: (as shown in the picture)

- Select Network Tab:

- Now click on the Settings button:

- Select the Manual Proxy Configuration in the Connection Settings window:

- Now Paste your shared proxy, as shown in the red rectangle in the following picture:

- Now paste/type the port number, provided by your proxy provider: (see picture)

- Select (if it’s not selected already) Use this proxy server for all protocols (You must select it for HTTP proxies or HTTPS proxies)

- Now click on the OK button:

Bravo! Now you know everything about configuring Mozilla firefox proxy settings
Also, read: How to protect yourself from Cybercrime?
